

Add Floors to Expand Your Office
This feature is currently rolling out to all Gather 2.0 spaces. If you don't see Floors yet, stay tuned -- you'll have it soon! 😄
As your team grows, you’ll eventually need more space in your virtual office, and that’s exactly what Floors are for! Each Floor acts as its own “level” within your virtual office, giving your teammates more space while keeping the office organized.
You can have up to 5 Floors per space. For the best experience, each Floor should hold about 100 people. Need more room? Reach out to our team.
Overview
In the top left of your screen, under your space name, you’ll see the Floor you’re currently on. Click it to view the list of Floors or to travel to a different one.
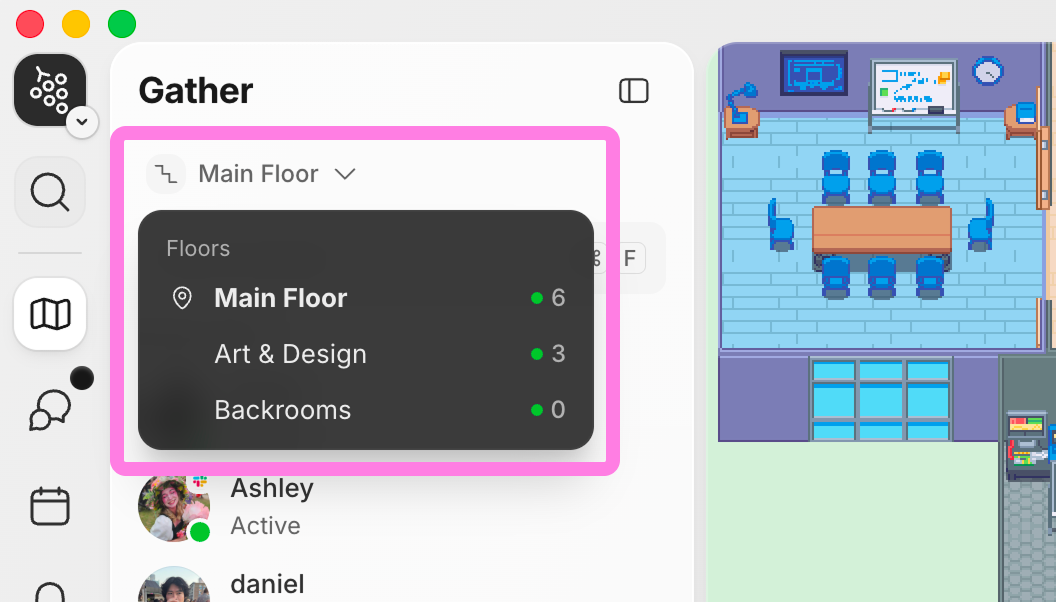
Interacting with teammates across Floors is seamless. You’ll see everyone listed in the Office panel, and you can still Wave or Go to them regardless of Floor. If you have a meeting on a different Floor, you’ll automatically go there when you click the meeting link. And all Members and Guests in your space can access all Floors.
Add or Remove Floors
Add a New Floor:
Open the Floors dropdown and select Manage floors.
Alternatively, open Gather Studio and select the stairs icon on the left.
Click Add a new floor
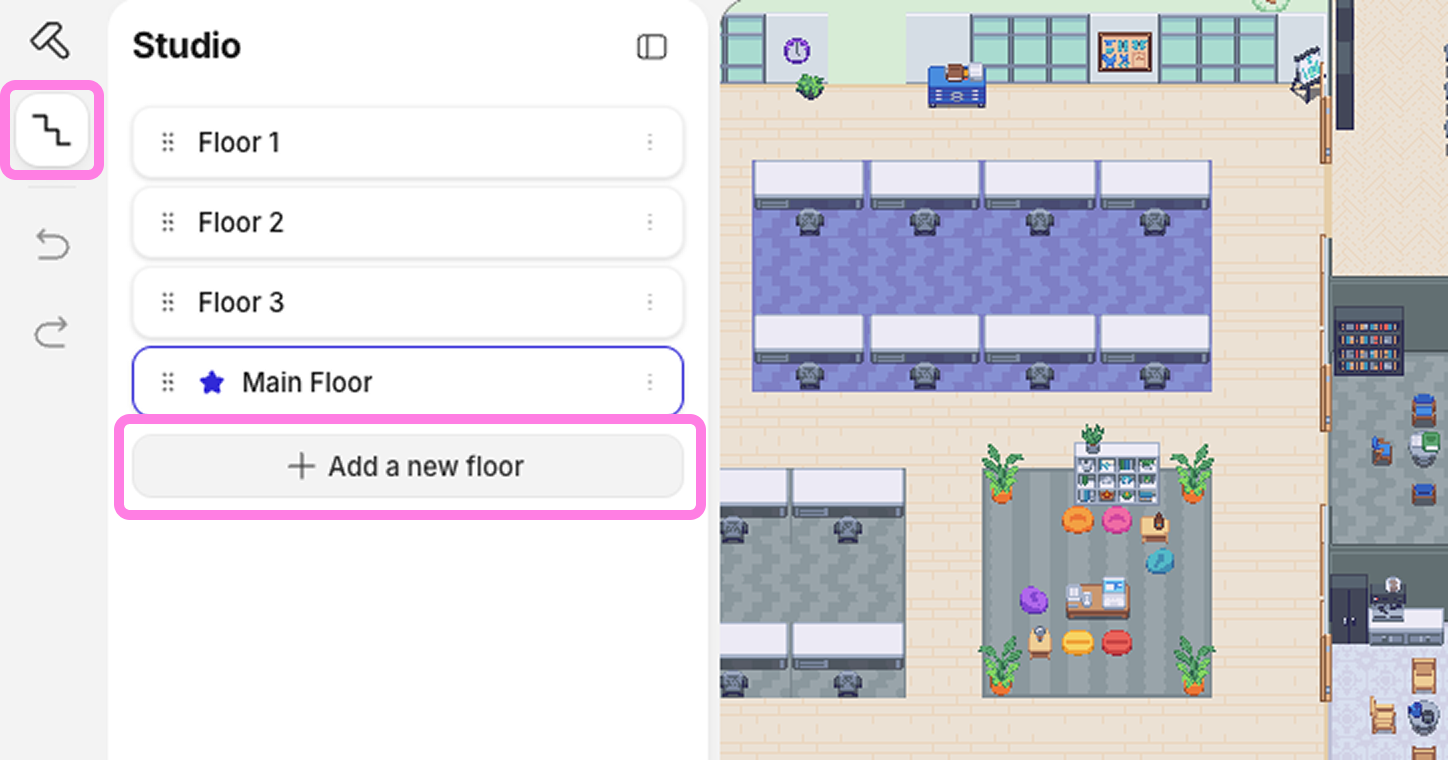
Set the Floor properties, including Name, Layout, Theme, and Size
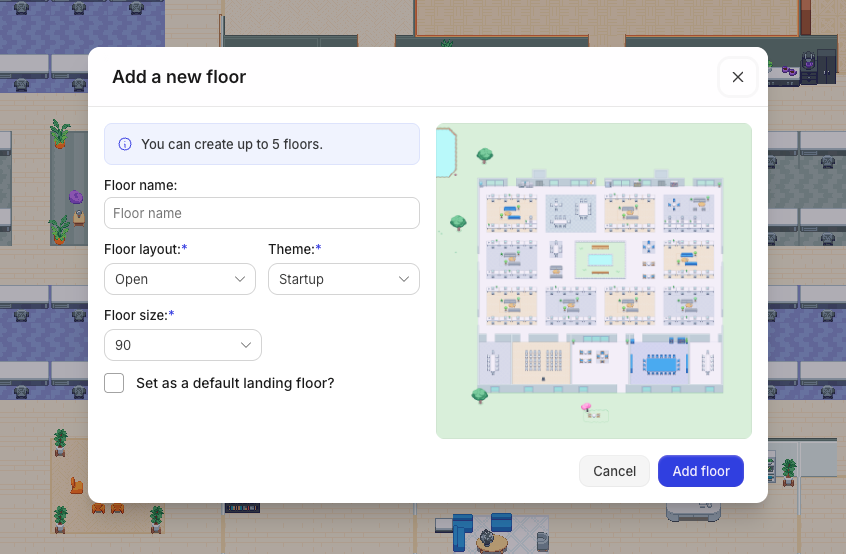
Optional: Select the checkbox to make this the new default Floor for your office
Click Add Floor to publish it. The new Floor will appear immediately for all users in your space.
Duplicate an Existing Floor:
Open the Floors dropdown and select Manage floors.
Alternatively, open Gather Studio and select the stairs icon on the left.
Find the Floor you want to duplicate and click the three dots for additional options.
Select Duplicate floor.
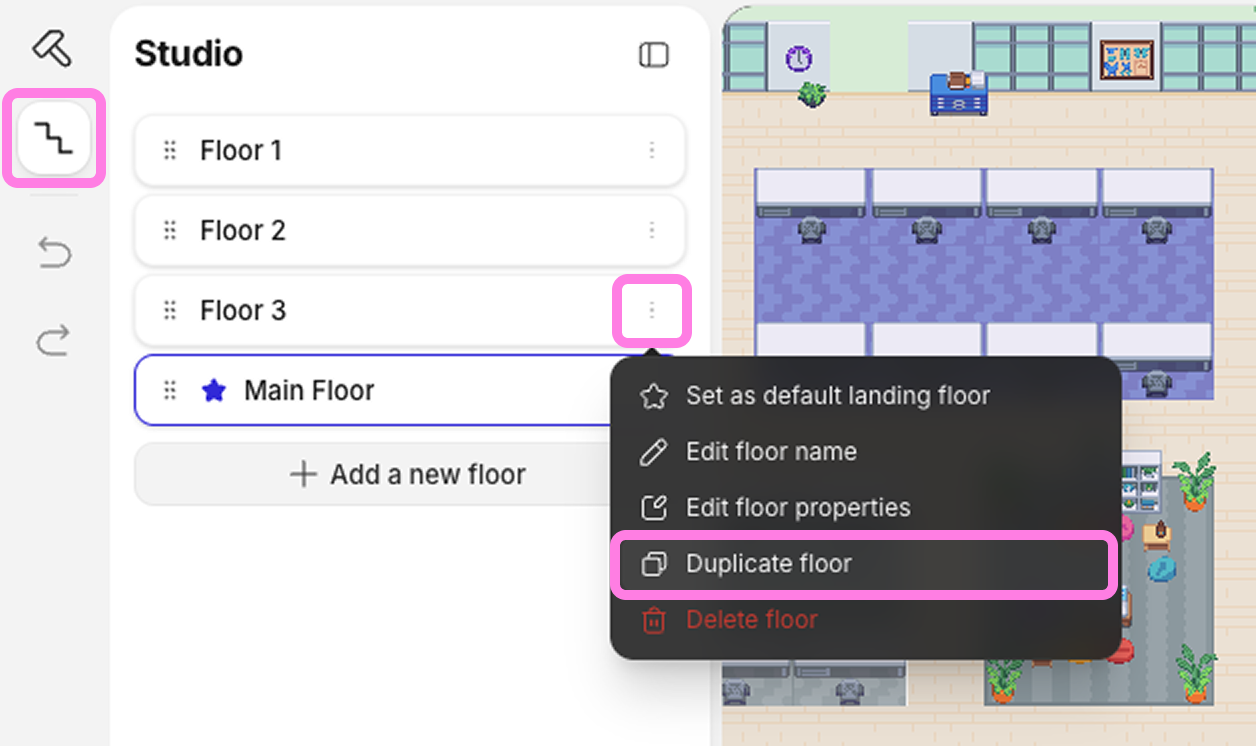
The Duplicate Floor will appear immediately for all users in your space.
Note: When you duplicate an existing Floor, all objects will be copied (including desk decorations), but desk assignments will not be copied. To assign desks, each user can claim their own, or Admins can use the Desk Manager.
Remove a Floor:
Open the Floors dropdown and select Manage floors.
Alternatively, open Gather Studio and select the stairs icon on the left.
Find the Floor you want to remove and click the three dots for additional options.
Select Delete floor.
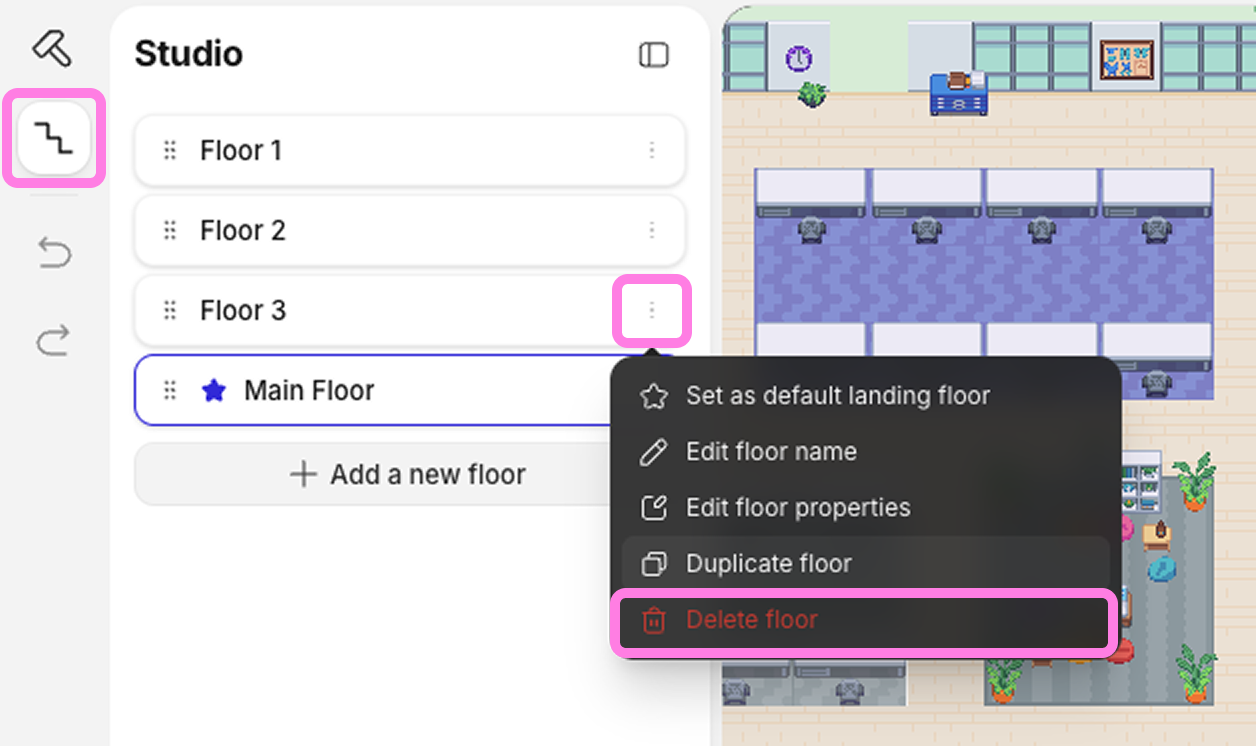
The Floor will immediately be removed from your space.
Note: Deleting a Floor will remove objects and desk assignments from that Floor. If any users are on the Floor when it’s removed, they’ll automatically relocate to your Main Floor’s lobby.
Customize Floors
Each Floor is unique and can be customized independently of the other Floors in your space using Gather Studio.
To Customize Floors:
Open the Floors dropdown and select Manage floors.
Alternatively, open Gather Studio and select the stairs icon on the left.
Click the Floor you want to customize.
It will load in Gather Studio, where you can move team areas, resize rooms, add objects, and change colors.
When you’re done making changes, click Publish.
If you make changes to multiple Floors, each Floor must be published separately.
Note: For the best experience, we recommend no more than 1,000 objects per Floor. This includes desks, chairs, decorations, trees, and every other object in your space.
To submit a bug report or share feedback:
Open the Main Menu and select ‘Report an issue’
Or email support@gather.town